Translate this page into:
A simple technique to remove a jammed locking screw
*Corresponding author: Dr. Sherif Elnikety, Department of Surgery, College of Medicine and Health Sciences, United Arab Emirates University, Al Ain, Abu Dhabi, United Arab Emirates. elnikety@uaeu.ac.ae
-
Received: ,
Accepted: ,
How to cite this article: Hammad W, Elnikety S. A simple technique to remove a jammed locking screw. J Musculoskelet Surg Res. 2025;9:153-6. doi: 10.25259/JMSR_344_2024
Abstract
Metalwork removal is associated with complications. One complication is the jamming of locking screws in and hindering the process. This issue can arise due to cold welding, stripped screw heads, or cross-threading. Various approaches have been suggested to tackle this challenge. In this article, we present a method for removing a jammed locking screw. The method is straightforward and cost-effective, designed for removing a single jammed locking screw without requiring additional kits or specialized extraction tools. The approach involves manipulating the plate around the screw to extract both together, preserving the screw head and avoiding the need for metalwork extraction tools. The authors have successfully applied this technique to multiple patients, finding it effective, simple, and quicker than other methods. In addition, this technique minimizes the risk of metallosis, wound complications, and local reactions compared to alternative methods.
Keywords
Jammed
Locking plate
Metallosis
Screw
Technique
INTRODUCTION
Challenges in the removal of metal hardware in orthopedics can stem from issues such as cold welding of screws, stripping of the screw head, or cross-threading between the threads in the screw head and the screw hole.[1-3] Screwdrivers are typically made of hard metal, while locking screws are occasionally made of softer titanium alloy, making it easier to damage the head of the screw. Over-tightening of locking screws can lead to cross-threading and damaging both the head of the screw and the plate. In addition, using locking screws made of different metal alloys than the locking plate can result in chemical reactions and co-bonding between metals, which may lead to locking screw jamming.
Surgeons are strongly advised to employ correct techniques and utilize aiming guides during the primary fixation procedure. This is essential to prevent damage to locking screws or the jamming of screws. A torque-limiting screwdriver is recommended to avoid excessive force during insertion. In addition, it is advisable to avoid mismatching plate and screw sizes and mixing implants and tools from different manufacturers to prevent screw head damage and cold welding.
Several methods and techniques have been proposed to address this problem. These include using conical screw extraction drills, cutting the plate, employing stainless-steel metal cutting blades, utilizing high-speed discs and burrs, as well as using different screw extractor kits.[4-6] Herein, we present a cost-effective and straightforward technique for addressing a solitary jammed locking screw within a locking plate. This method employs readily existing equipment and minimizes the potential complications associated with alternative approaches. This technique can be used independently or in combination with other methods to remove jammed and retained metalwork and it applies to titanium, stainless steel, and other types of screw materials.
SURGICAL TECHNIQUE
This technique should only be considered after the failure of the standard procedure for removing the locking screws and plate. The standard procedure involves using the recommended screwdriver, ensuring proper engagement with the screw head, and providing adequate soft tissue and bone clearance. Our technique is specifically indicated when only one locking screw is jammed in the plate. While it can be used for deep-seated plates, it may require substantial soft-tissue clearance to facilitate the rotation of the plate. This technique is particularly well suited for the removal of subcutaneous plates.
Clearance of any bony on growth and overgrowth is mandatory, in addition to addressing all adhesions and soft-tissue scarring, as typically required for any metalwork removal. The technique relies on two fundamental principles. First, when the locking screw is jammed in the locking plate, the entire construct becomes rigid and fixed, moving as one block. Second, it capitalizes on the inherent design of the screw, which transforms axial rotation into linear force.
The technique begins with gently loosening the plate by carefully inserting a periosteal elevator or a similar tool beneath its edges at various points to detach it from the bone. Subsequently, the locking plate is moved in a rotational motion in opposite directions, both clockwise and anti-clockwise, using the jammed screw as the rotational axis. These initial steps ensure that the plate can move with minimal risk of causing bony fractures at this stage. The rotation continues until the plate moves freely and is free of any adhesions.
Once this freedom of movement is achieved, the plate should rotate easily in the anti-clockwise direction. This action will result in the unscrewing of the jammed screw, allowing the plate to be lifted further from the bone, creating additional bony clearance. To facilitate this, a punch and mallet can be used to gently tap the end of the plate sequentially until it is dislodged.
As the plate is rotated further in the anti-clockwise direction, its edges should approach near-perpendicular alignment with the bone. This alignment can potentially lead to compression of the surrounding soft tissues, which is why this technique is advised for subcutaneous plates. Substantial soft-tissue clearance is necessary for deep-seated plates.
Once the plate’s edge is nearly perpendicular to the bone, we employ two tools to bend the plate upward. These tools can be two pairs of pliers or dedicated plate-bending tools. One tool is positioned at the free end of the plate, and the second is placed closer to the bone to prevent the transfer of bending force to the bone. This stage requires careful handling and diligence to avoid iatrogenic fractures. It is recommended to begin bending the longer end of the plate unless the jammed screw is in the middle of the plate or access is challenging.
Depending on factors such as soft-tissue clearance and access ease, bending the other end of the plate may not be necessary. While bending the other end can be advantageous to minimize damage to the surrounding soft tissue, it also carries the risk of iatrogenic bone fracture as the surgeon attempts to bend the plate. Surgeons must carefully assess this risk at this stage.
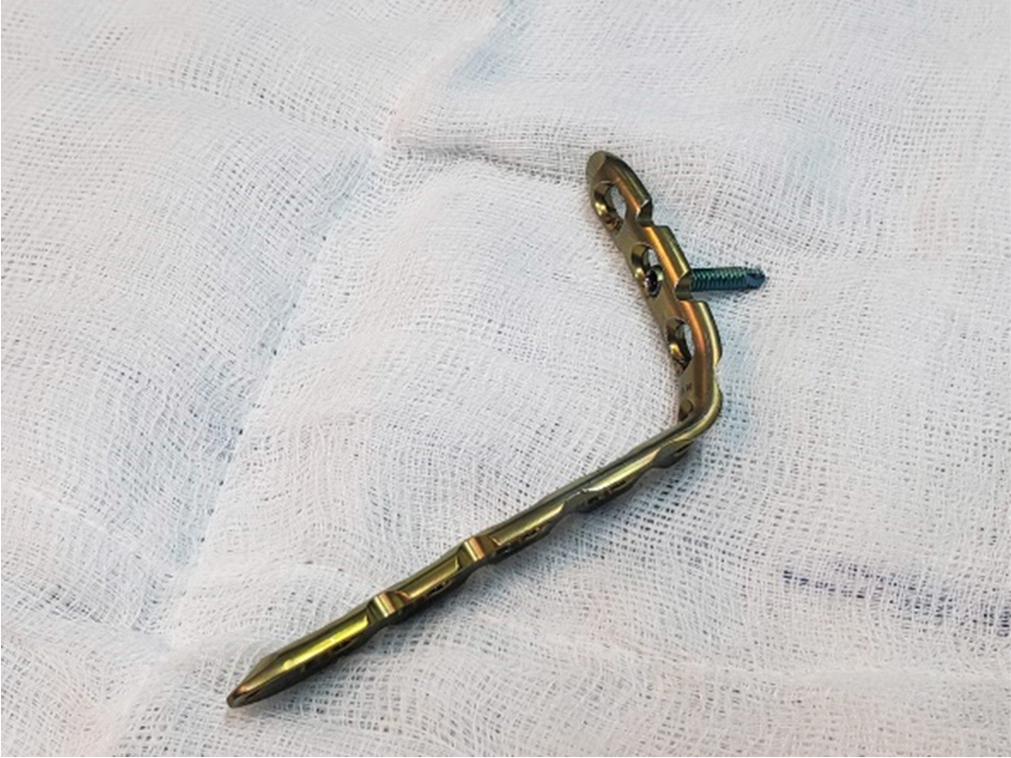
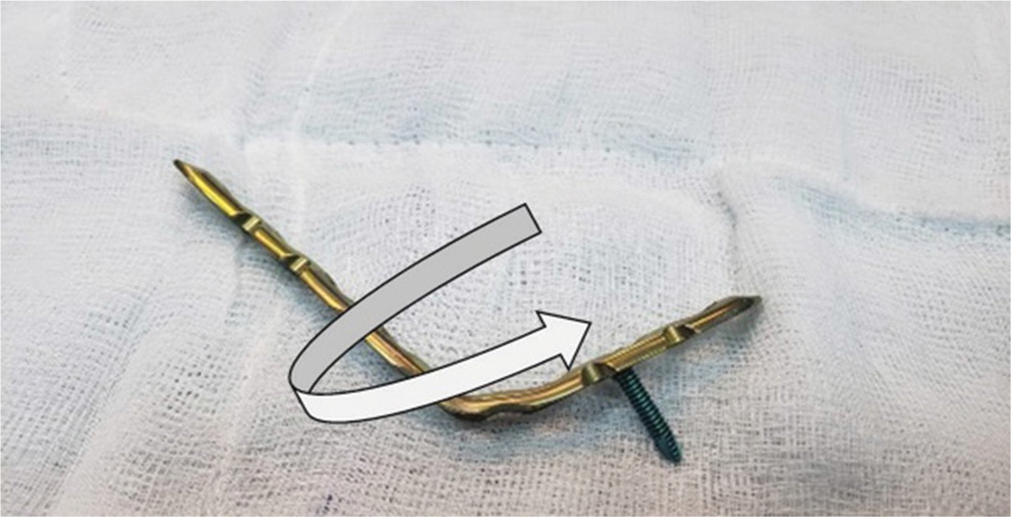
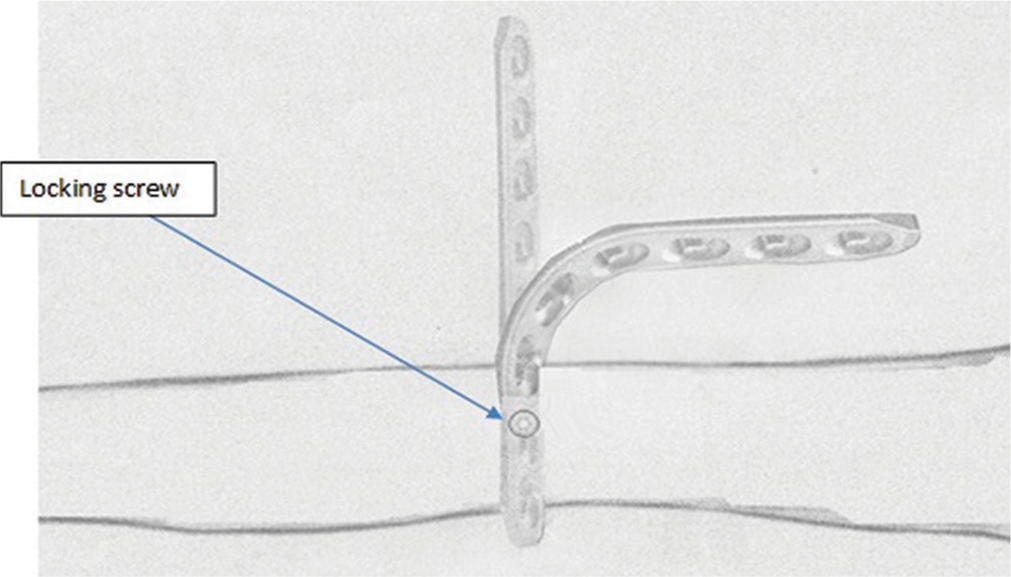
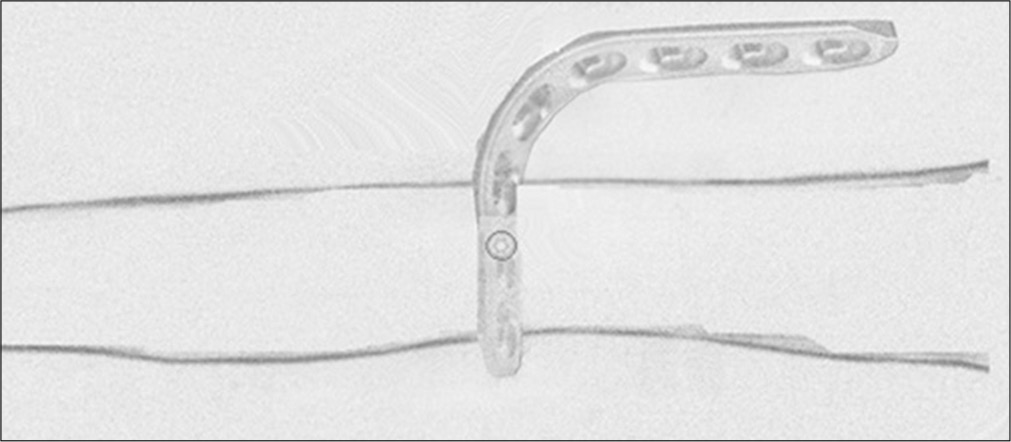
Once both ends of the plate are appropriately bent, it acts as a screwdriver. Continuing to rotate the plate in the anti-clockwise direction will gradually unscrew the jammed screw from the bone. This rotational movement is sustained until the jammed screw is fully dislodged from the plate [Figures 1-5].

- Lateral view of the bent locking plate and jammed locking screw.

- Lateral view of the bent locking plate and jammed locking screw with an arrow (white arrow) showing the anti-clockwise rotation of the whole plate with the screw in as one piece.

- Lateral view of a demonstration of the locking plate on the bone with the jammed locking screw in.

- Superior view of a demonstration of the locking plate transition into a bent plate after rotating the plate 90° horizontally with the bone while the jammed locking screw is in.

- Superior view of the final form of the bent plate before screwing it and the screw out of the bone together as one piece.
DISCUSSION
One of the most frequently reported complications in metalwork removal is failure of the removal, with screw head stripping being the leading cause. Such failures can have adverse effects on patient care, hindering the achievement of successful outcomes. Therefore, surgeons must possess both the knowledge and the skills necessary to prevent complications and address them promptly if they occur.
Our technique was similarly advocated by Bae et al., who used it for the removal of the distal-most screw when it was the only jammed screw. Their approach involved cutting the plate after bending it and using a clamp to rotate the remaining portion of the screw and plate.[7] Likewise, Gopinathan et al. described a technique for removing a locking reconstruction plate with jammed screws. They advocated cutting the plate into units, each containing one screw, and removing each unit separately.[8]
We do not advocate cutting the plate, as it will likely result in significant metallosis. It is also costly and time-consuming. Our technique can be used for screws in any position like Bae et al. described the technique to be used for the jammed screw in the distalmost plate hole.[7]
Drawbacks of techniques used to remove jammed metal include significant soft-tissue damage and the potential for metallosis and chronic tissue pigmentation, which can occur with the use of conical reverse-threaded drill bits, screw head destruction, high-speed burrs, and carbide drill bits. These methods often generate metal debris, contributing to the risk of metallosis and related issues.[2,9] In addition to the earlier complications, metalwork removal procedures can also be associated with wound problems and local tissue reactions. These are important considerations in surgical planning and patient care.[2,6,9,10]
The risk of interference with bone vascularity is an important concern, especially with extensive periosteum stripping; hence, care must be considered.[11] The use of hollow reamers to extract the shaft of a screw is one technique, but it can result in significant bone defects that increase the risk of iatrogenic fracture, especially when multiple screws are removed.[11] Most of these techniques require special instruments, which may not be routinely available. Most also require special skills to perform the procedure with the additional tools, cost, and time consumed.[9]
Although our technique is limited to one jammed locking screw, it is simple. It does not require additional skills. It is cost-effective to utilize the readily available tools. It is time efficient and allows the removal of the jammed screw with minimal soft tissue damage to the surrounding structures.
Like most other techniques, our technique has the potential drawback of bone refracture while bending the plate due to pressure transfer. Hence, surgical pliers or plate bending tools are essential to prevent the propagation of bending force to the bone. Along with due diligence and adequate skills, this should minimize the risk of refracture.
Our technique has a limitation: it is designed to remove only one jammed screw. However, it can be used in combination with other techniques to reduce the complications associated with those techniques. Applying our technique to deep-seated plates may be challenging, as this may necessitate extensive soft-tissue clearance to allow for plate rotation and access for bending the plate. We have successfully applied this technique on several occasions without encountering complications. Most of the procedures involved removing locking plates used for upper limb fixation, but we have also used them for removing locking fibular plates.
CONCLUSION
This technique is simple, time-efficient, and does not incur additional costs. It relies on tools readily available in any fracture fixation set. Orthopedic surgeons should acquaint themselves with this and other removal techniques before taking locking plate removal procedures.
AUTHORS’ CONTRIBUTIONS
WH, SE: Conceptualized the study, designed the methodology, wrote the initial draft of the manuscript, assisted in data collection, performed the surgical procedures, and contributed to the discussion and revision of the manuscript. Both authors have critically reviewed and approved the final draft and are responsible for the manuscript’s content and similarity index.
ETHICAL APPROVAL
This technique was used in different cases from different institutions, and it is not a new technique with the use of new equipment. However, it was done with the materials that were available at hand. Hence, no ethical approval was required.
DECLARATION OF PATIENT CONSENT
Patient’s consent is not required, as there are no patients in this study.
USE OF ARTIFICIAL INTELLIGENCE (AI)-ASSISTED TECHNOLOGY FOR MANUSCRIPT PREPARATION
The authors confirm that there was no use of artificial intelligence (AI)-assisted technology for assisting in the writing or editing of the manuscript and no images were manipulated using AI.
CONFLICTS OF INTEREST
There are no conflicting relationships or activities.
FINANCIAL SUPPORT AND SPONSORSHIP
This study did not receive any specific grant from funding agencies in the public, commercial, or not-for-profit sectors.
REFERENCES
- Technical difficulty of metal removal after LISS plating. Injury. 2004;35:626-8.
- [CrossRef] [PubMed] [Google Scholar]
- Removal of the less invasive stabilization system. J Orthop Trauma. 2004;18:562-4.
- [CrossRef] [PubMed] [Google Scholar]
- Treatment of proximal tibia fractures using the less invasive stabilization system: Surgical experience and early clinical results in 77 fractures. J Orthop Trauma. 2004;18:528-35.
- [CrossRef] [PubMed] [Google Scholar]
- Easy and inexpensive technique for removal of round headed, jammed locking screws in distal tibial interlocking plate. J Orthop Case Rep. 2015;5:35.
- [Google Scholar]
- An inexpensive and rapid method for removal of multiple stripped locking screws following locking plating: A case report. Int J Surg Case Rep. 2019;57:134.
- [CrossRef] [PubMed] [Google Scholar]
- Case report: A technique to remove a jammed locking screw from a locking plate. Clin Orthop Relat Res. 2011;469:613.
- [CrossRef] [PubMed] [Google Scholar]
- Technical difficulties of removal of locking screw after locking compression plating. Arch Orthop Trauma Surg. 2009;129:91-5.
- [CrossRef] [PubMed] [Google Scholar]
- Surgical technique: Simple technique for removing a locking recon plate with damaged screw heads. Clin Orthop Relat Res. 2013;471:1572-5.
- [CrossRef] [PubMed] [Google Scholar]
- Technical difficulties in hardware removal in titanium compression plates with locking screws. Orthop Traumatol Surg Res. 2009;95:373-6.
- [CrossRef] [PubMed] [Google Scholar]
- Metallosis due to impingement between the socket and the femoral head in a total hip prosthesis. A case report. Acta Biomed. 2002;73:85-91.
- [Google Scholar]
- "Turn the tail, not the head": A simple, quick and inexpensive technique for the safe removal of jammed/stripped locking screws. Eur J Orthop Surg Traumatol. 2020;30:1119-23.
- [CrossRef] [PubMed] [Google Scholar]


